IMPORTANT TO KNOW:
With poured concrete retaining walls, backfill is placed between the wall and the slope after the wall is constructed; therefore, many engineers call the retained soil behind a retaining wall as backfill.
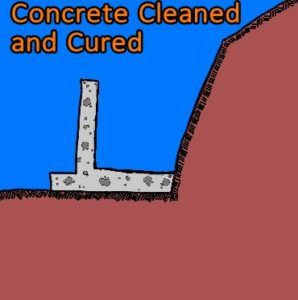
A gravity retaining wall “L” shape, as exemplified in this sketch, was chosen for this video, because it is one of the most common types of retaining walls.
This is called gravity retaining walls because the weight of the materials behind the wall, and the volume of the wall itself, as long as the wall is monolithic and solid, will maintain its stability by gravity.
The building of this type of wall, although seemingly complicated, it’s the simplest and most efficient general design.
Probably that is why many engineers prescribe this type of wall for most of the not-so-drastic terrains, because it is a simpler solution and cost-efficient.

Retaining Walls Build In 5 Easy Steps:
1-STEP: Grading
This is the first step, after you have dealt with design and engineering, comes grading. It involves excavating the areas to be retained, and shaving away the hillside to fit all elements of the new retaining wall.
The surface where the base of the wall will be built, needs to be spacious enough so that all of the steel reinforcements and forms will fit inside and can be made stable.


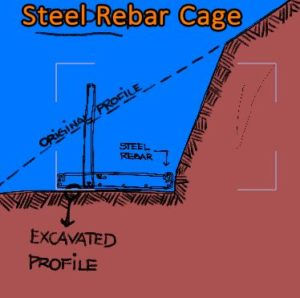
2-STEP: Rebar Cage Assembly
If you don’t buy pre-made cages, all the steel reinforcements have to be built and installed in place, usually it still looks like a cage and it is built according to engineering design. It includes sizes of rebar, positioning of each rebar and distancing according to plans.

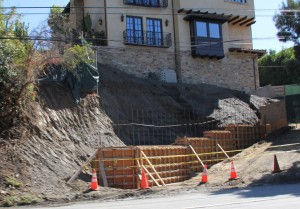
3-STEP: Build Forms
In order to obtain the desired dimensions according to the design, usually we build temporary wood, but for some specific designs we assemble a steel-plate form. These are built to create the final shape of the concrete wall.
It wont, be part of the retaining wall. All its elements will be removed after concrete is hardened enough for hand-finishing imperfections.


4-STEP: Concrete Pour
After the temporary concrete forms are in place and strong enough to receive the weight of concrete in liquid form, a concrete pour is scheduled.
All forms are filled with concrete and vibration tools are used to make the concrete fill every nook and cranny in between the forms and in between steel rebars. VO of animation.
The concrete pour has to happen in its entirety on the very same day no matter the size of the retaining wall. Unless you use additives, but that it’s a topic for another video.
A same-day pour has to happen, because the integrity and stability of this wall depends on the monolithic strength of the concrete pour.
When poured on different days, that creates cold joints, which makes the wall susceptible to cracks.

5-STEP: Installation of Extra Devices and Backfill
Once the concrete sets, the forms are removed and the next elements can be put in place.
Specially while you wait for complete cure of the concrete, which takes up to 28 days for a complete cure, any chosen elements for protection of the retaining wall should be installed.
That is the perfect time for things like, drainage, waterproofing, caps or decorations to be installed.
Only after the curing period has passed, the backfill is allowed to go in.


Comentarios